
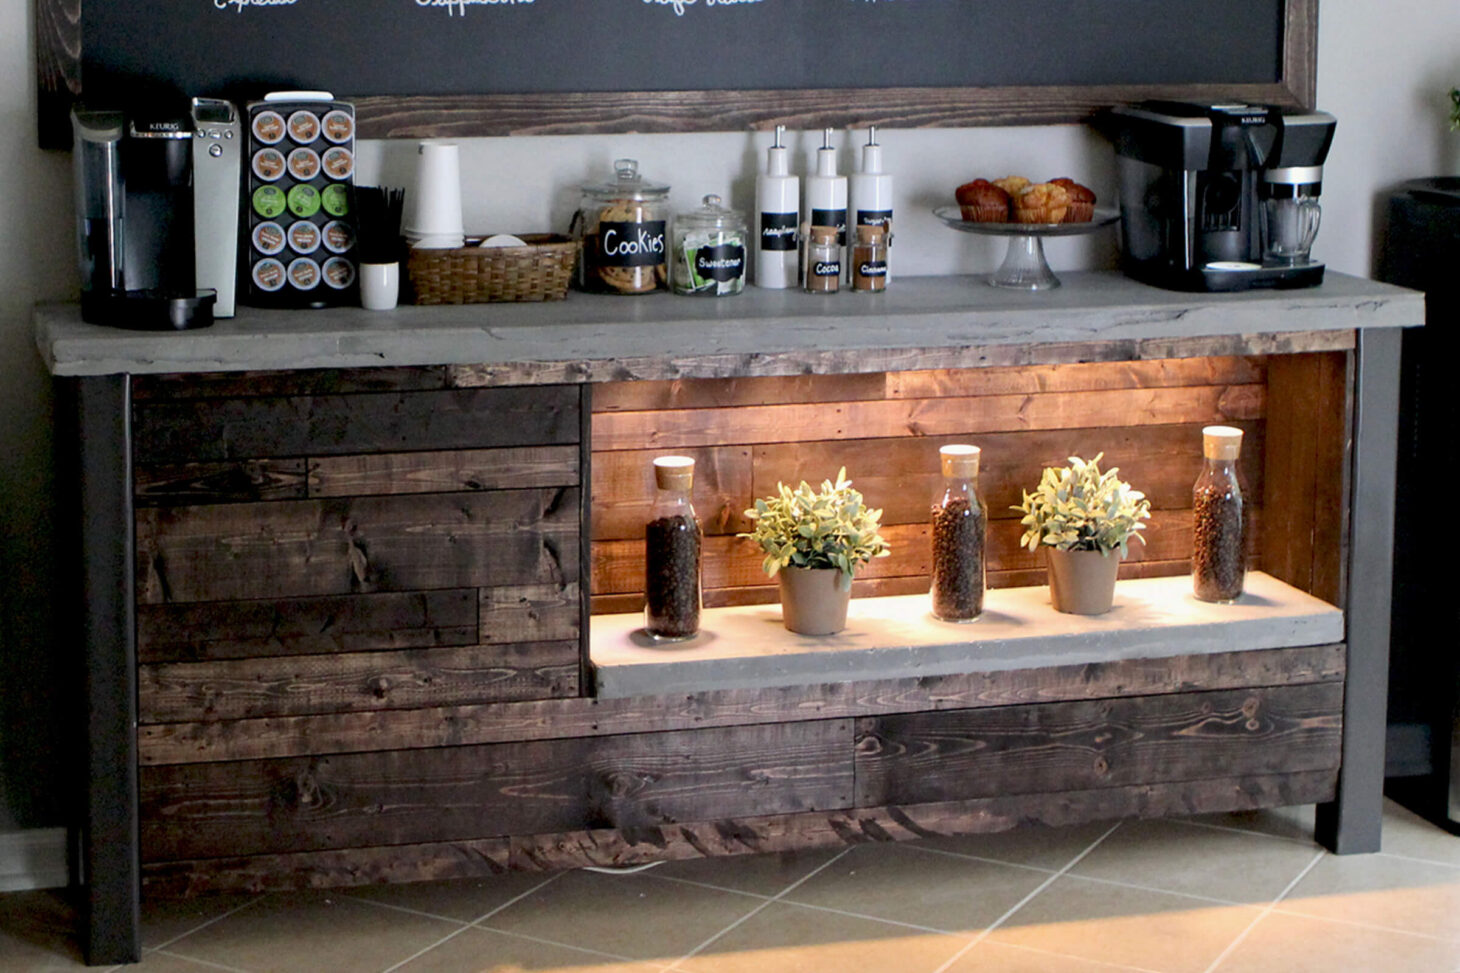
Inspired by the cozy feel of coffee shops, we designed and built our own large DIY coffee bar to bring the a calming coffee shop atmosphere to our breakfast nook. Below is an outline of how we built our coffee bar base.

Our large coffee bar build turned out to be pretty intense. We designed, built, and decorated the entire massive piece of furniture in just a week. A week of 3AM building sessions, closing down hardware stores, and concrete mixing….well….more like fighting with concrete.
Brent’s DIY coffee bar design really did exceed my expectations. It filled up our long empty wall perfectly and completely transformed the boring space into a warm, eclectic and inviting area.
Interested in building your own DIY coffee bar? Below we outline how we built our coffee bar base.
How We Built Our DIY Coffee Bar Base
materials + tools
- Coffee Bar Base Woodworking Plans
- Rust-Oleum Spray Paint, Gray Primer
- Rust-Oleum Ultra Cover 2X Spray Paint, Oil Rubbed Bronze
- (2) 4″x4″x8′ Pine Board
- (8) 2″x4″x96″ Pine Board
- (1) 4’x8′ Hardboard Tempered Panel
- (5) 1″x3″x8′ Furring Strip Board
- (6) 1″x4″x8′ Furring Strip Board
- (3) 1″x6″x8′ Pine Board
- 36″x36″ Piece of Sheet Metal
- 2-1/2″ Pocket Screws
- 2″ Wood Screws
- 1/2″ Pan Head Screws
- 1″ Finishing Nails
- 2″ Finishing Nails
- Titebond-3 Ultimate Wood Glue
- Construction Adhesive
- Rust-Oleum Ultimate Wood Stain, Kona
- Table Saw
- Drill
- Nail Gun
- Kreg R3 Jig Pocket Hole Kit With Clamp
- Miter Saw
- Hammer
FYI: This post contains a few affiliate links to products we used to make this project. Gray House Studio does receive commissions for sales from these links but at no extra cost to you. We appreciate you supporting this site. Read our privacy and disclosure policy. You can also easily shop our recommended products here.
project plans
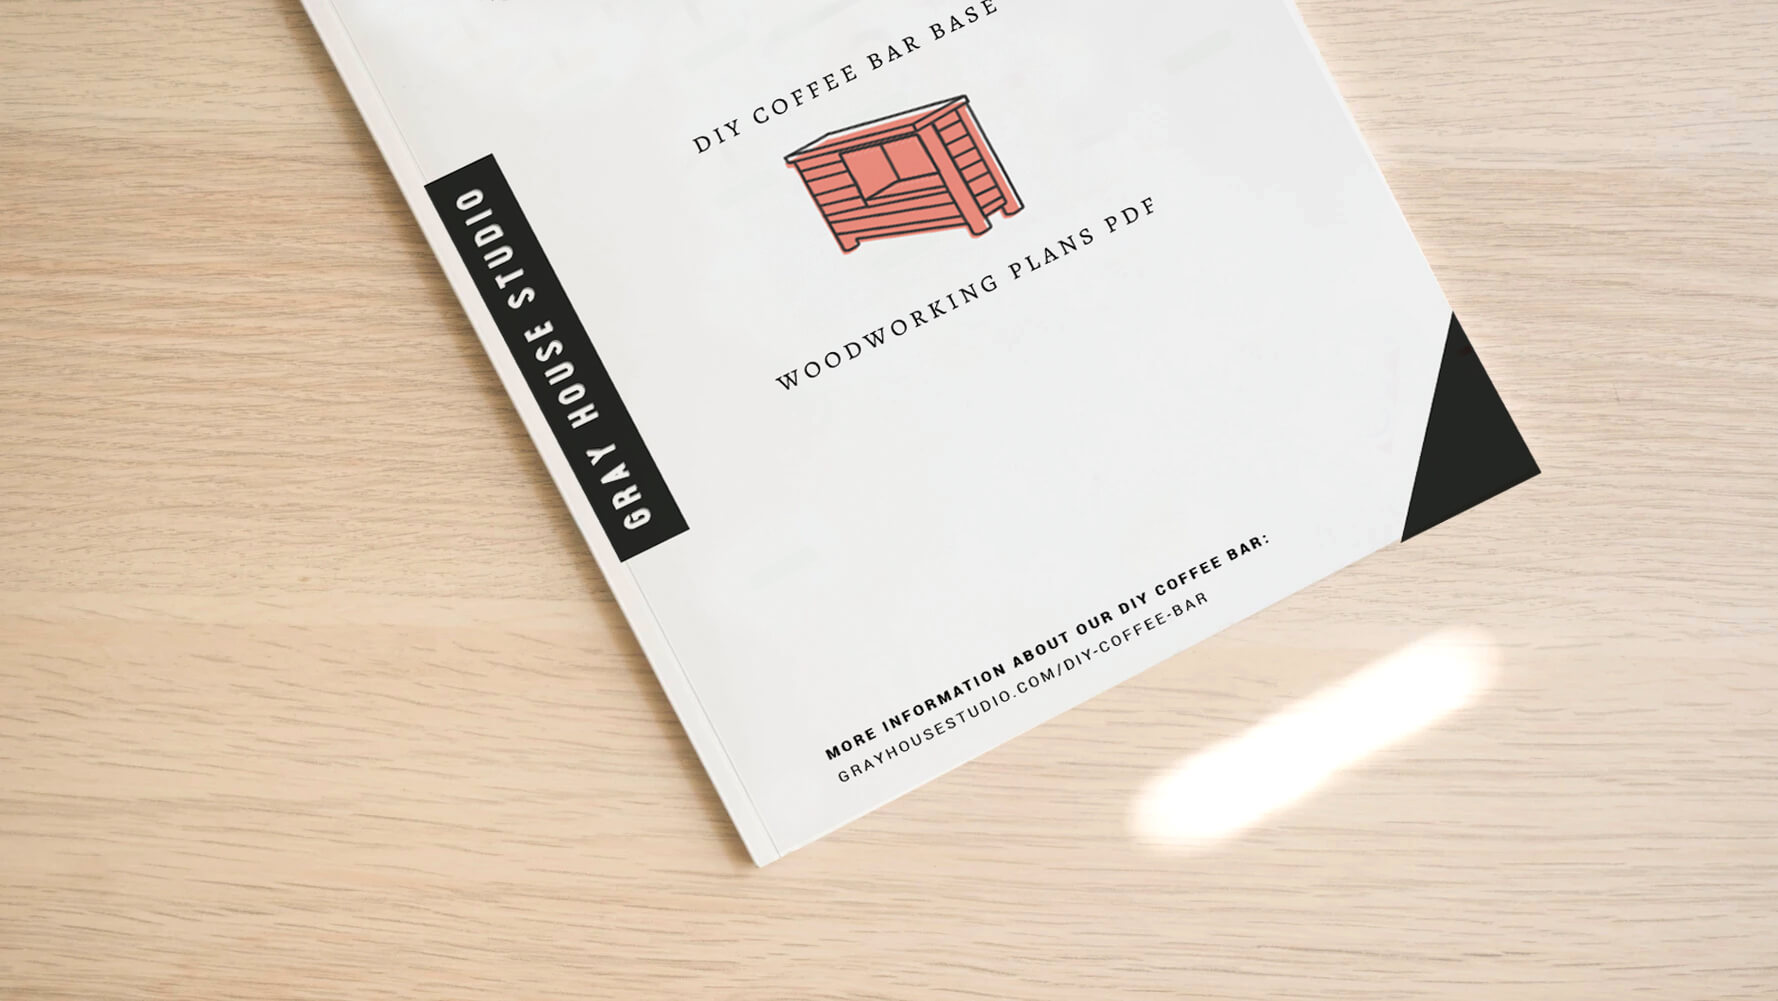
When you purchase our coffee bar base plans you get a 17 page PDF with a detailed materials list, a cut list, dimensions for each piece, and building instructions. We appreciate your support of Gray House Studio!
steps
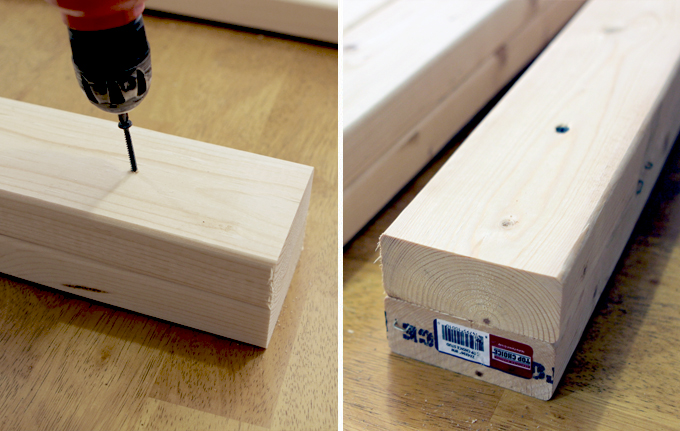
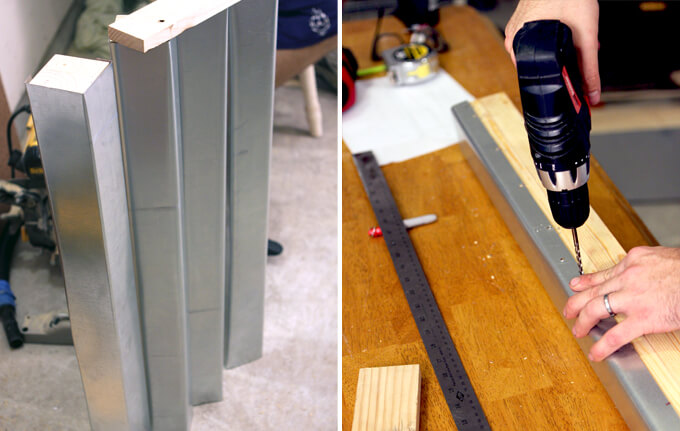
1. The legs of the coffee bar are actually made of wood! This trick saved us a lot of money. To make each leg we combined two 2″x4″ boards by screwing them together.
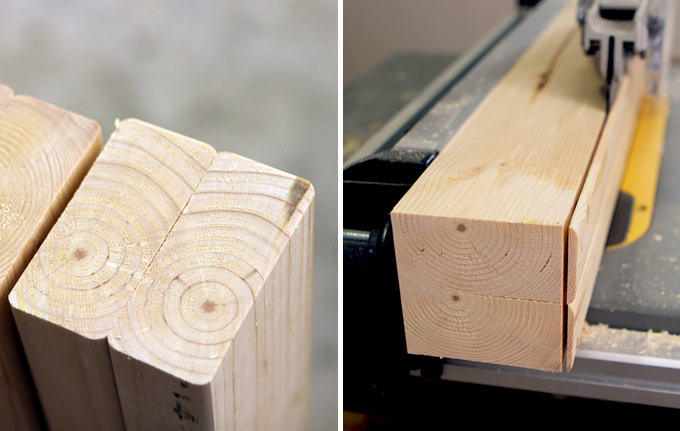
After we got them all assembled, we realized we could have just bought 4x4s. Duh! After we combined the boards together, we ran the boards through our table saw to square them up.
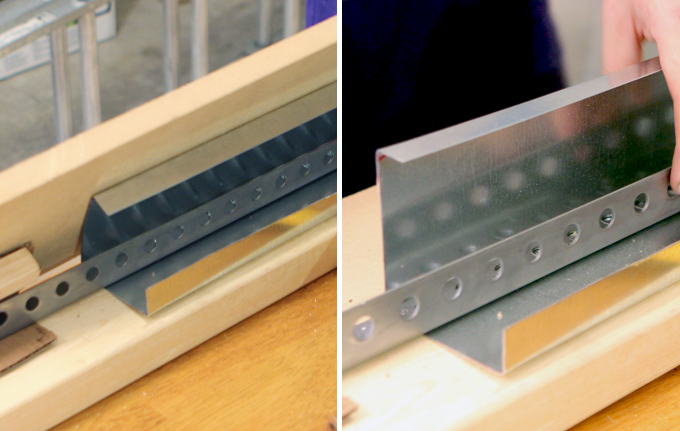
2. To make the legs appear as if they are steel we wrapped each wooden post in sheet metal.
We didn’t have access to the actual tool to bend sheet metal so it was pretty difficult to get it formed into the right shape to cover the wooden post.
We improvised and made our own version of a sheet metal brake out of some scrap wood and a piece of angle iron. By clamping the sheet metal in between the wood and the angle iron, we could bend it around the edge of the angle iron creating the shape we needed. After we wrapped each leg, we secured it to the wood with a drill and screws.
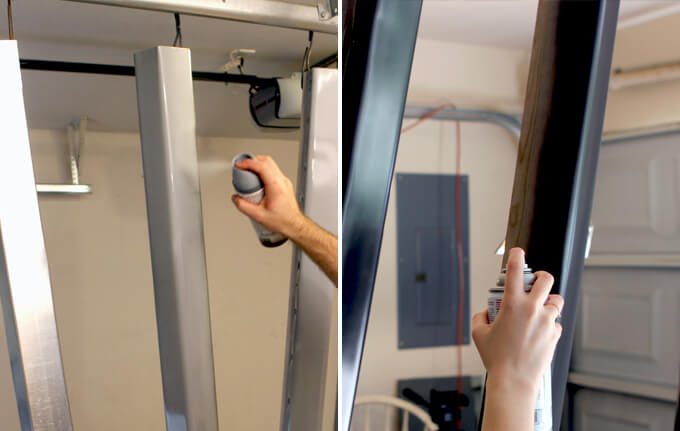
3. Next we prepped the legs for paint and then spray painted a primer on them.
We let the primer sit over night and then the next day we spray painted them with an oil rubbed bronze spray paint.
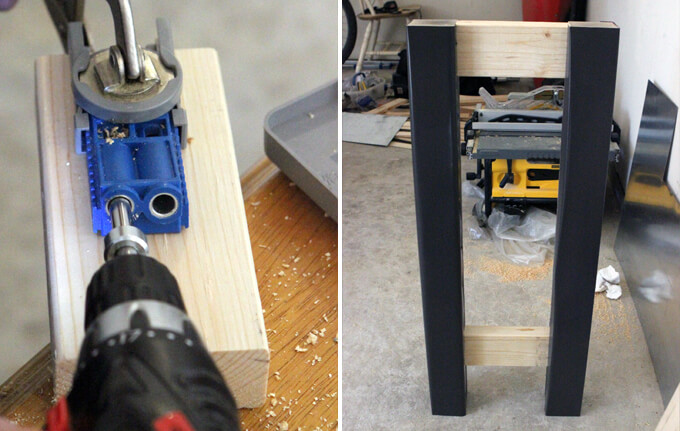
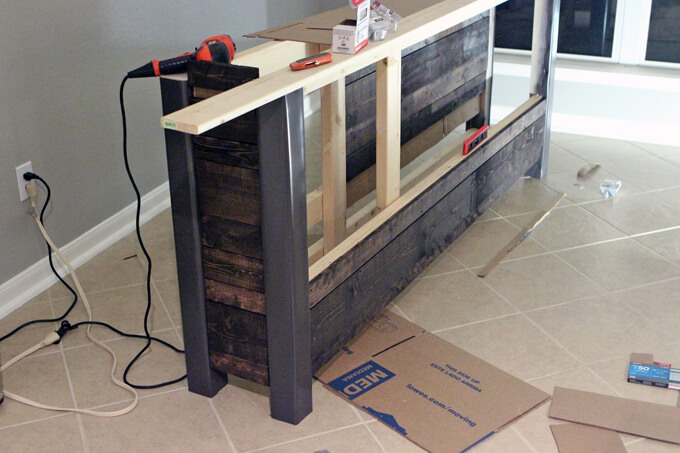
The legs are held together by two pieces of 2″x4″ lumber and they are secured together with pocket screws.
We used our Kreg Jig pocket hole kit to drill the pocket holes.

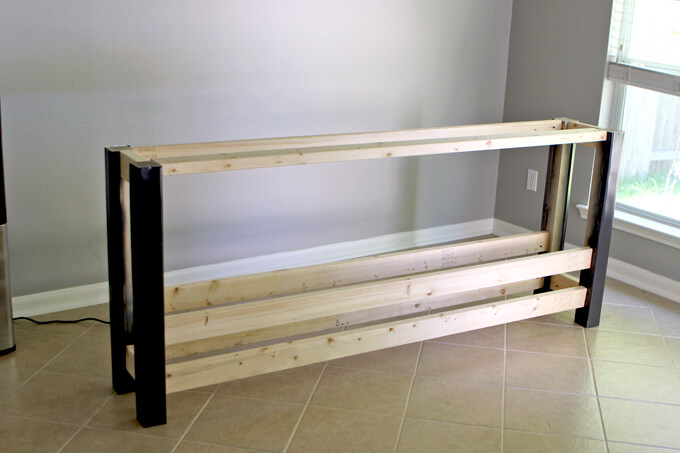
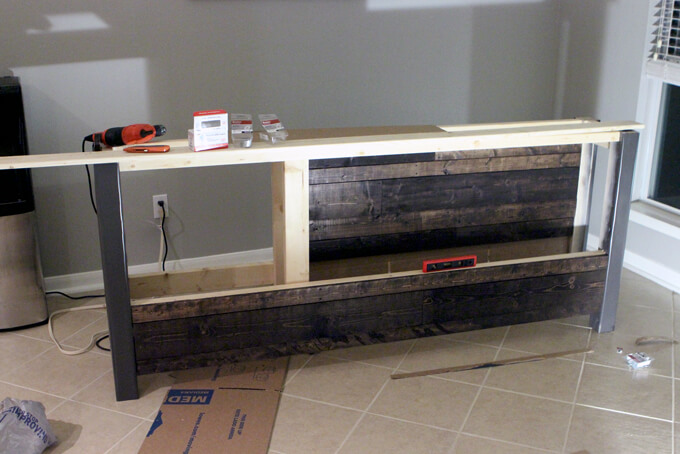
4. The support structure for the coffee bar base is made of up 2″x4″s. Most furniture does not use 2″x4″s because they would make the piece super heavy.
But for this project it helped us save money. Plus, I’m not sure if in any capacity you could make a 7 foot bar with a concrete countertop light, so the extra weight wasn’t a concern of ours. This thing is not going anywhere.
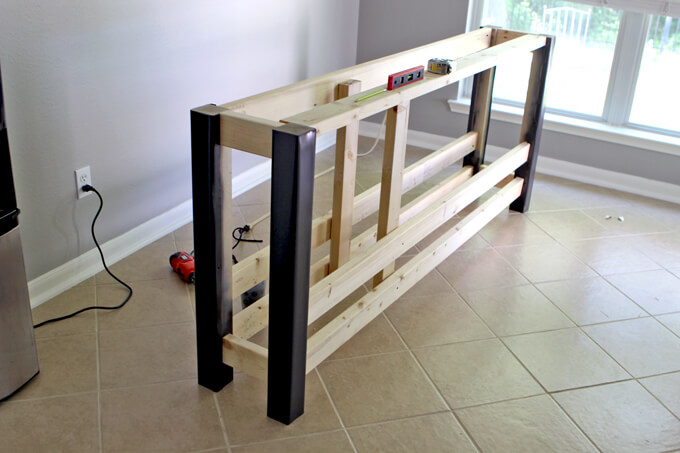
5. We thought ahead and knew this thing was going to be massive and impossible to move very far so we built the entire thing (concrete top and all) right in place in the breakfast nook.
After we got the main structure put together, we added vertical supports to add strength for the braces that would support the concrete countertop and to frame out the recessed opening and shelf that would go in the front of the coffee bar.
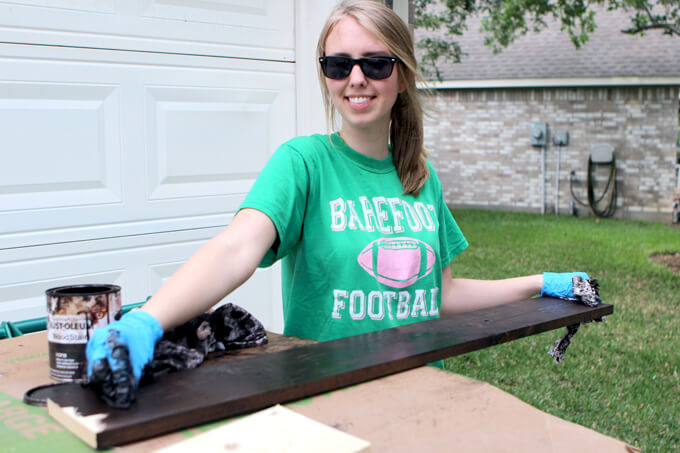
6. Next up was my favorite part, staining! We used our favorite stain, Rust-Oleum Ultimate Wood Stain in Kona.
We wanted to tie the breakfast nook area into the living room area since it is one big open space so we thought bringing in the weathered wood planks from the wall in the reading nook would be the perfect solution.
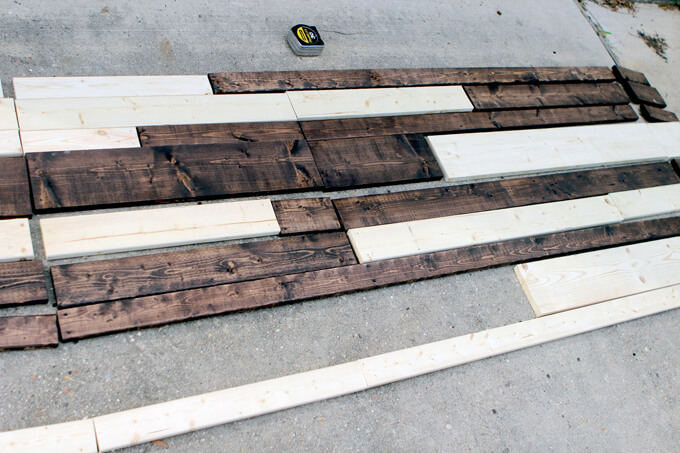
7. We ran through our whole process of creating weathered wood by varying the degree we would rough up the pieces to alternate shades and patterns. But this time we did it rapid speed.
We cut, roughed up and stained all the boards for the entire bar in a matter of maybe two hours. It was a whirlwind of staining and in the process I managed to get stain all over myself, including on my face and in my hair. I don’t know how that happens. We laid out all the boards on the ground this time so we could easily create a nice pattern of varying colors and lengths.
8. By the time we finished staining all the boards and they dried, it was already getting late. But we were so passionate about this project that we were in the zone!
We pushed on and started attaching the wood planks to the coffee bar structure. To do this we screwed through the 2″x4″s into the wood slats.
9. We added the planks to the bottom, the back of the recessed area and even the sides between the legs to give the allusion that it was wrapping around the entire bar. I love how the sides turned out.
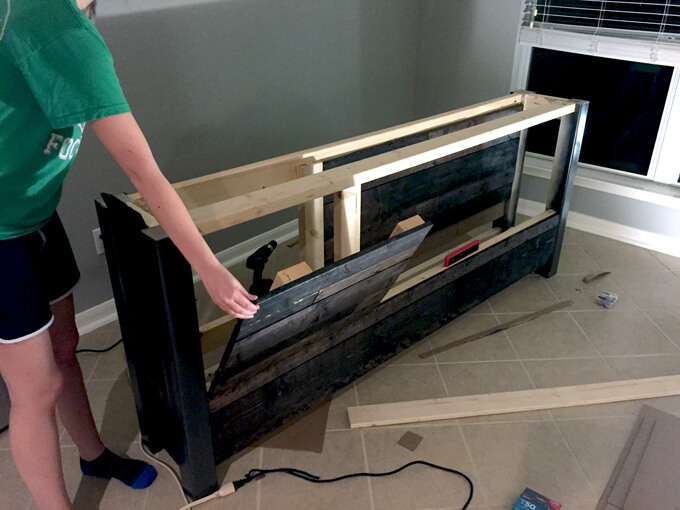
10. Finally Brent built the front of the hidden storage area that opens on a hinge to a shelf where we can store extra coffee supplies and mugs. We then covered that piece with the weathered wood planks as well.
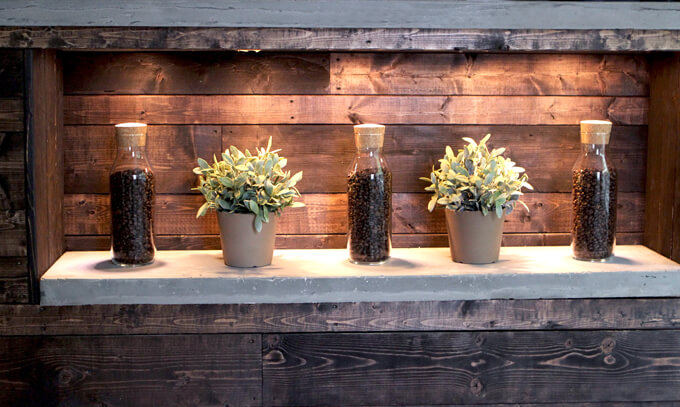
11. To finish the coffee bar base we added more wood planks to the sides of the recessed area to complete the look. Then we attached our concrete shelf.
Brent installed lights below the counter top and I decorated with these cute bottles that I then filled with coffee beans.
The plants are also from Ikea and add a bit of color to a very neutral and industrial design. I think the shelf is my favorite part of the coffee bar. It adds so much depth and interest and we think it really makes the piece look unique.
To get detailed building instructions for our coffee bar, check out our DIY coffee bar plans.
Some of our projects we prepare for months in advance. We draw up plans ahead of time, we set budgets and save to put money aside for the project, we make a list of the supplies we need and then depending on the scope of the project we spend several weekends working on it since we both work during the day.
And then there are some projects, like this one, where we throw all that out the window and just jump in head first with the intention of finishing it in a week. We were so passionate and into this project that we just threw ourselves completely into it which led to some really late nights. But in the end it turned out perfectly, it is very solid and beautiful and is definitely one of our home’s statement pieces that is always a head turner.
Like this project? You might also be interested in how we made the concrete countertop for the DIY coffee bar and made the large DIY framed chalkboard hanging above it.
Would you be interested in making a coffee bar for us with different dimensions?
Hi, on the plans it tells you the cuts, but not specifically where to use the 1×3 and 1×4 slats. Is it just a matter of preference?
Hy. How much the coffe bar ?
Will you please forward the process you used to make the concrete tops?
Thanks
Hi Robert – you can find our process on this post https://grayhousestudio.com/diy-concrete-countertop/. Thanks for your interest!
Wonderful project, very cool and think how much money you saved by doing it yourself!
Thank you for taking the time to post the detailed tutorial and downloadable plans. I’m officially inspired.
Thanks for the feedback Michael!
I love the coffee bae…..Would you sell it??
Hi Kristi! Thank you so much! Currently, we are not selling them. We will let you know if we do. Thanks for the interest. 🙂
Hi Brent. Can you please provide instruction on how to download the plans? I registered, but it keeps asking me for a passcode.
Hi Adler, we are apologize for the trouble. There is an email with the passcode once you confirm your email registration. If you are still having trouble please let us know and we can follow up with an email.
Love this! Do you have an estimate of how much it cost you?
Hi Kayla! We estimate the cost of the completed coffee bar to be about $500. This includes all the consumable supplies for the concrete casting and extra add-ons like the under mount lights.
How did you install the shelves behind the door and what did you use for undermount lighting?
The shelf attaches to the front and back horizontal brace behind the door. We used Ikea’s Omlopp LED spotlights. They are relatively inexpensive and mount very easily to the 2″x4″ board in the front of the cabinet with a screw.
“Cirrus cloud” – funny!! 😀
I cannot describe how much I loved this idea, I am planning to do a coffee corner in my mother’s house, and I found this to be such an inspiration for me, I already ordered the small jars 🙂 . I recently opened my new blog and for sure when I am done with the coffee corner I will post the results.
Thanks for the inspiration.
Hi Reem, That is great to hear! We would love to see the coffee corner when you finish. You can tag us on social media @grayhousestudio and use #grayhousestudio.
What colors of stain did you use and what lumber?
We used Rust-Oleum Ultimate Wood Stain in Kona. http://amzn.to/2e7HbGx (affiliate link)
Would love to do something like this in our new house that we are building, But about half the size! Love it thanks for sharing!!!
Hi,
This project is awesome!!! You guys are very talented! Where do I find this plan? Thank you so much!
Thanks Madz! You can find the plans on our plans page: https://grayhousestudio.com/plans. If you sign up to be an insider you will be taken to a page that has the password for the coffee bar plans. Feel free to send us an email if you need any help accessing them.
-Courtney
Thank you so much for the beautiful inspiration.
Absolutely LOVE this – great design inviting us to sit down and enjoy a cuppa. Functional, fun, and witty. Wow! Look forward to more posts from you. Thank you for your generosity.
Thanks for following along! We are excited to share the projects we have planned for the new year. Personally, I find it therapeutic to read her perspective after I mess something up. -Brent
What a wonderful idea. I’m feeling so inspired and plan on creating my very own coffee bar area. So glad I stumbled onto your site. Definitely going to keep up with your blog…..
Hi Angela! Thanks so much. We are glad to hear it inspired you. So happy you found us. Keep in touch! 🙂
-Courtney
Hi GrayHouseStudio!
I emailed you regarding the coffee bar plans. Not realizing I can send a message here. Have you had the chance to draw out the plans/dimensions for the coffee bar? Thanks!
Hi Beatrice!
Brent is working on finishing the plans for the coffee bar this week and we should have them up and available to download on our plans page on the blog very soon. Check back this coming weekend. Thanks for your interest!
-Courtney
Awesome…Thank you!
Love it! Please post the to do list when it’s ready! ????????
What is the machine opposite the Keurig?
Hi Kat, That is a Keurig R500 Rivo Cappuccino and Latte Single Serve Brewer. Courtney gave that to me last Christmas and I love it!
-Brent
My husband and I were wanting to make something like this. Do you have a list of what is needed for wood and the cuts needed to be made?
Hi Danielle! We have not put together plans for this project yet because we built it on the fly to fit the dimensions of our kitchen. It is exciting to see how many people are interested in adapting this project to fit their space and we are working hard to make plans for future furniture projects. We have added to our to-do-list to make official plans for the coffee bar. Thanks for your interest.
-Courtney & Brent
I love your post!
Thanks Geanie!
How did you do the concrete top?
We made a form to pour Quikcrete concrete in by screwing 3/4″ Melamine coated particle boards together. To create a smooth edge on the concrete countertop we caulked the inside edges of the form with a silicone caulk. We will have a post coming soon with all the details.
-Brent
This is so freakin cool. Thank you so much for the beautiful inspiration. I am sure mine will not come out as lovely but I am going to cluelessly give it a try!
Thanks Laurel! That is awesome you are going to make your own. I’m sure you will do great! We would love to see how it turns out when you finish. 🙂 -Courtney
How did you make the chalk board. I like it all, nicely done!
Hi Lisa! Thank you! Here are the details on how we made our large framed chalkboard: https://grayhousestudio.com/diy-framed-chalkboard/
-Courtney
I would like a Coffee with Hazelnut, please! Mom would like a hot chocolate. Is that legal at you coffee bar?