
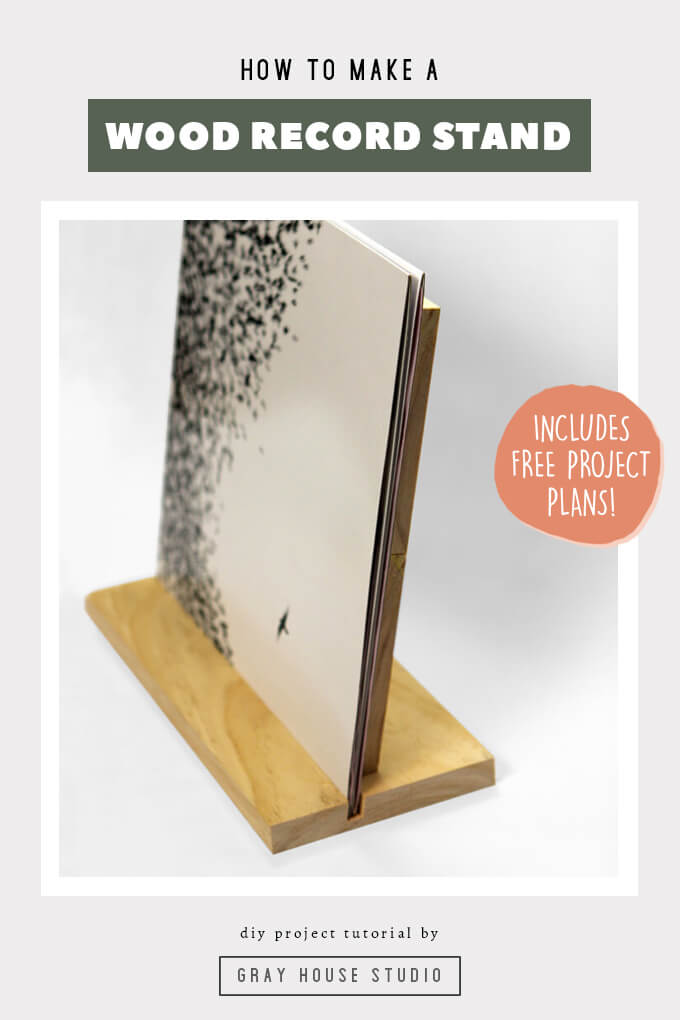
For all our fellow record lovers out there, check out this quick and easy project, our DIY record stand, to show off your favorite albums in your home.
You may have noticed in our last post on our library shelves that we are displaying a few of our favorite records on the shelves.
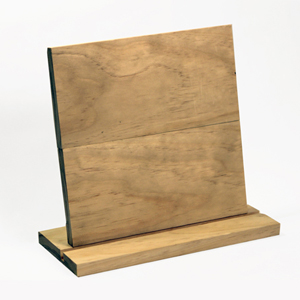
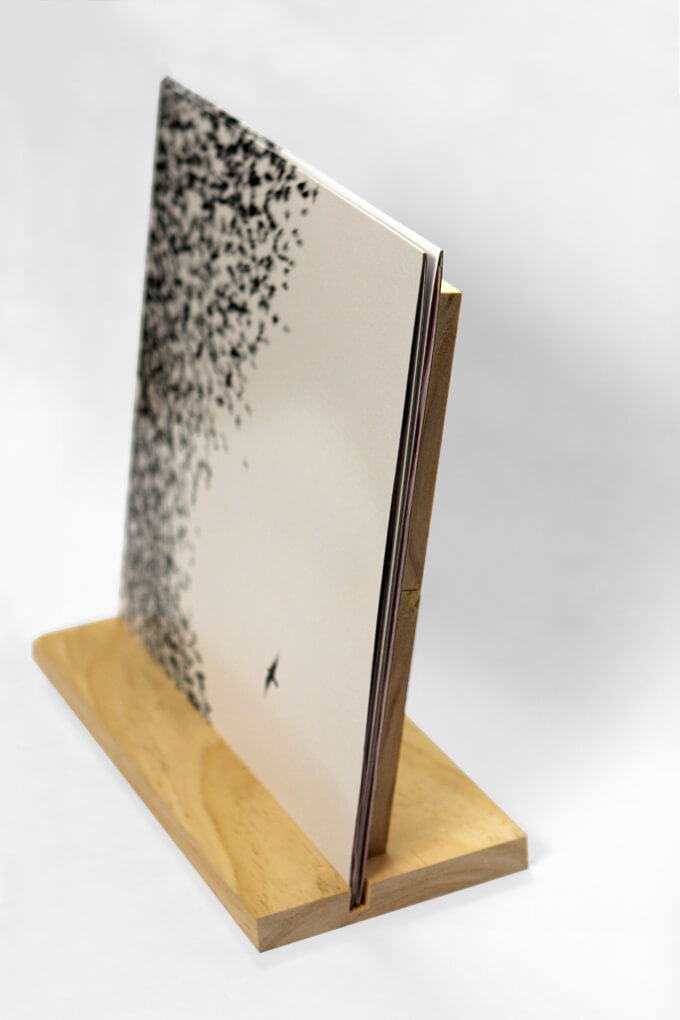
They are sitting in custom built stands that Brent built out of wood. By displaying them on these stands we have easy access to grab our favorites.
If you have a few of your favorite records that you want to display but want to make sure they stay in good shape, this DIY record stand is a great solution.
Plus, it is completely customizable. After it is built you can stain it or paint it whatever color you want to match your decor.
How to Make a DIY Record Stand Out of Wood
SUPPLIES
- Record Stand Plans
- 1 in. x 6 in. x 8 ft. Select Pine Board
- 3/8″ Wooden Dowel Pins
- Miter Saw
- Table Saw
- Joint Genie
- Drill
FYI: This post contains affiliate links to products we used and liked for our DIY record stand. As an Amazon Associate Gray House Studio earns from qualifying purchases. This is at no extra cost to you. We appreciate you supporting this site. Read our privacy and disclosure policy.
STEPS
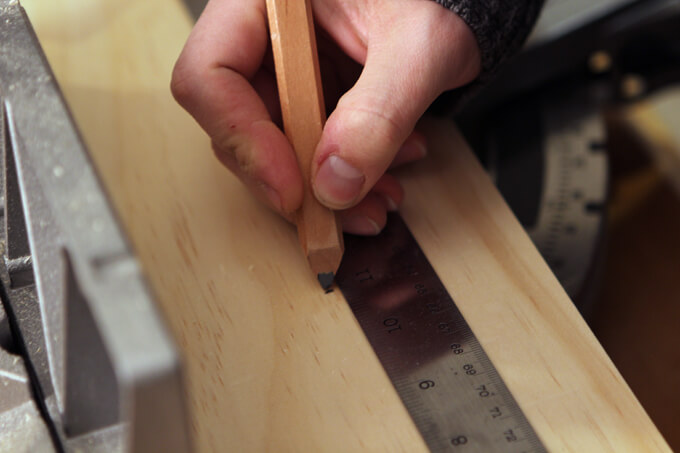
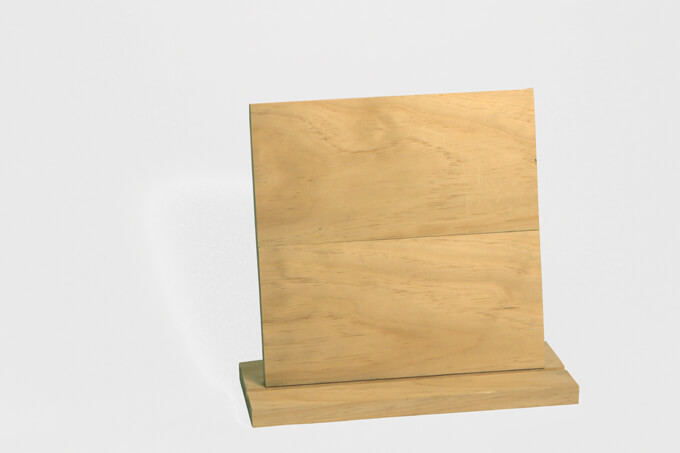
1. First, we measured the 1 in. x 6 in. select pine board to prepare to cut the base of the stand and the top braces. The base is 12 1/2 inches wide. The two top braces are 11 inches wide.
For more details on the exact dimensions, download our DIY record stand plans for accurate measurements.

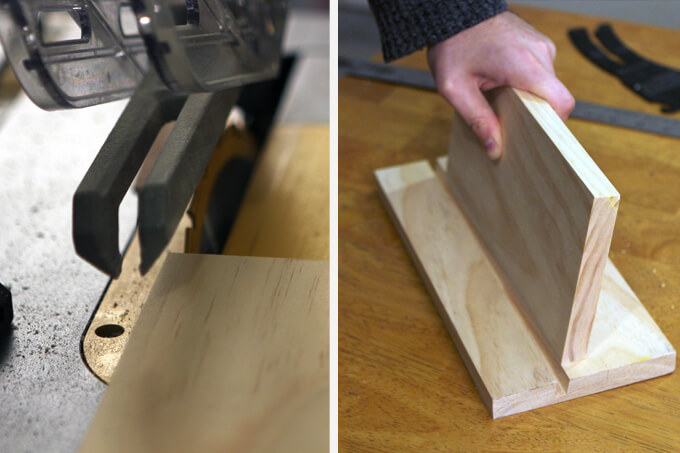
2. Next, we used a miter saw to cut the boards to the sizes we measured.
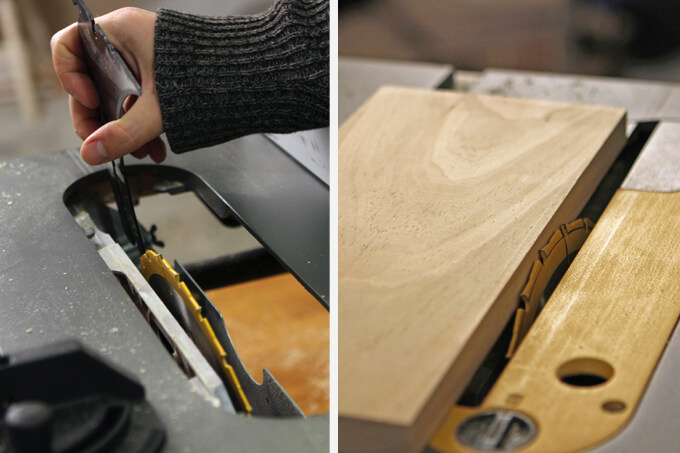
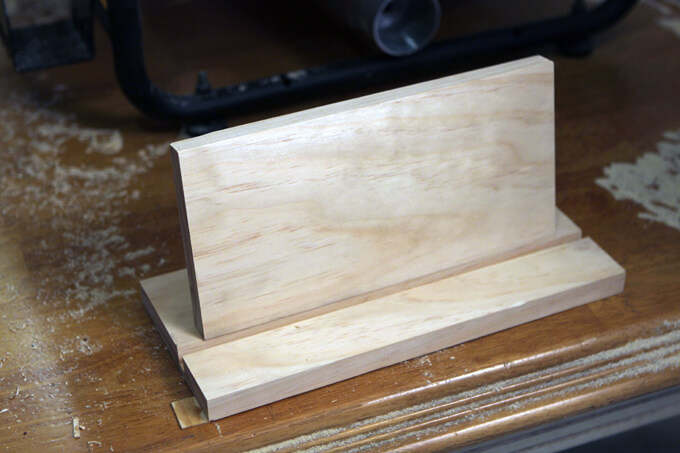
3. To create a slot in the base for the record to sit in, the blade guard of the table saw needed to be removed.
This allows the blade to cut only partially through the board. By placing the board next the blade it is easy to see how deep the slot will be in the base.
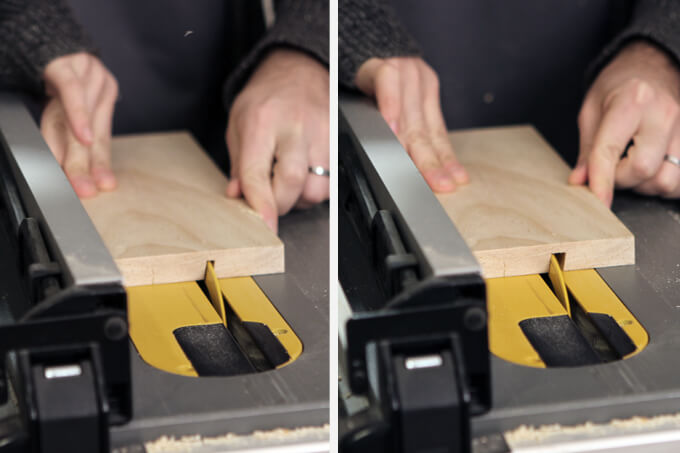
4. After each pass over the table saw blade, we moved the table saw fence slightly to cut a wide slot.
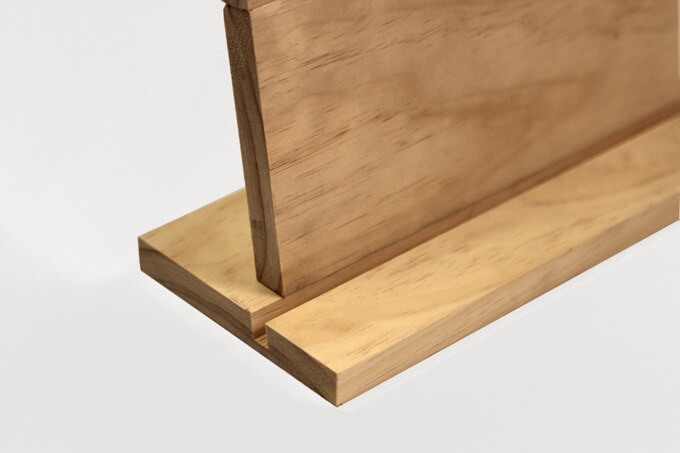
The back of the stand needs to sit at an 80 degree angle so we had to cut the bottom of the bottom brace at a 10 degree angle.
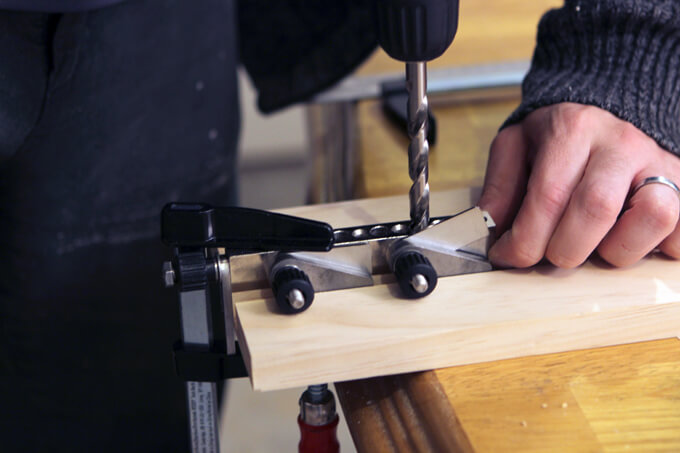
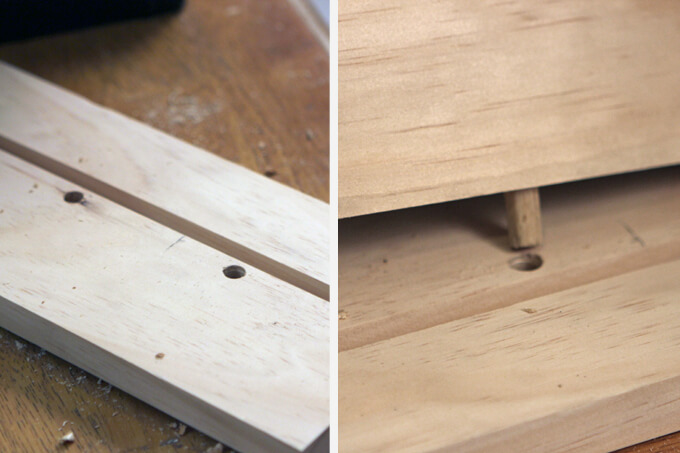
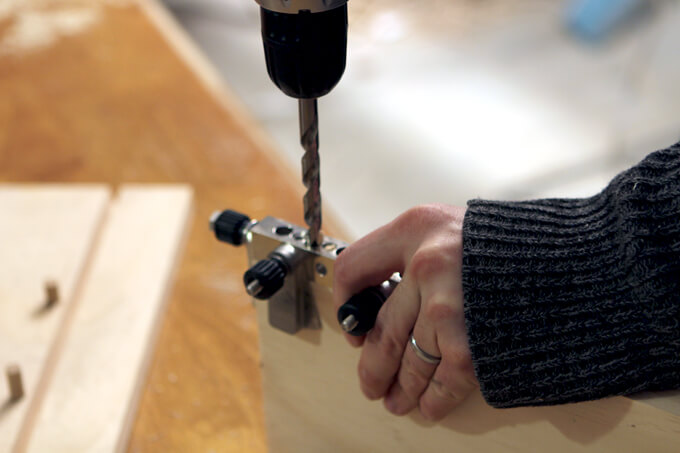
5. We used the Joint Genie and a drill to make holes that would connect the pieces via dowel pins.
6. The Joint Genie makes it really easy to line up the holes with the dowel pins.
7. No matter how many times Brent drills holes to join two blocks of wood together with a dowel pins, he still gets excited about the final result every time.
8. Once the base was connected to the bottom vertical brace, we drilled holes into the two vertical braces so we could connect them with the dowel pins.
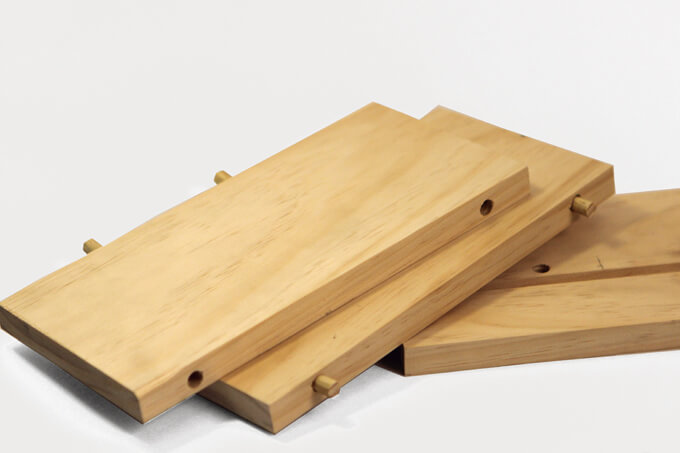
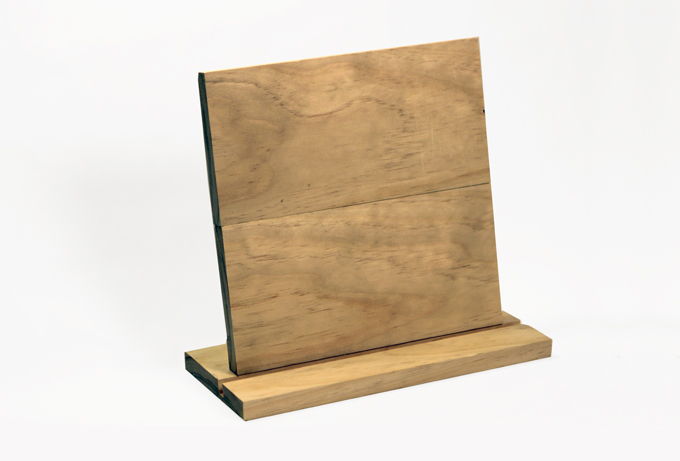
The great thing about building the stand this way is that no glue is needed so it can easily be disassembled and reassembled and consists of just three pieces.
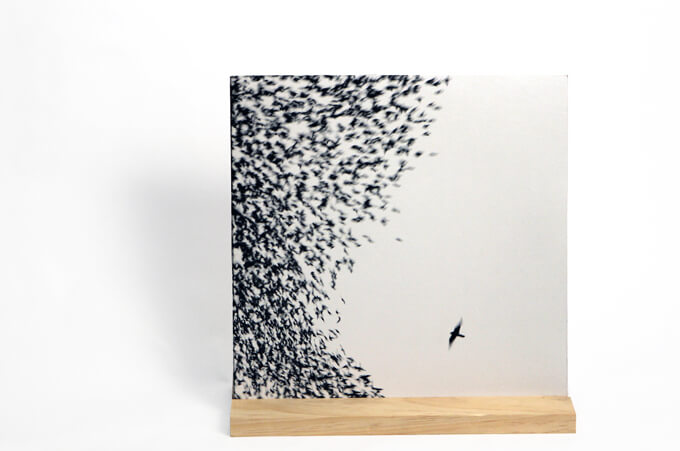
Also, album cover artwork can make for an interesting alternative to traditional art. The six records we choose for our library were ones where we liked the design of the covers and thought had a visual appeal similar to the other art in our home.
We searched for record stands but most of the ones we found had no back or had a back that was half the height of the record. We have found that stands built these ways do not fully support the record and can eventually damage it by warping it over time.
We couldn’t find one out there that exactly fit our needs so we built our own that was all these things we were looking for: simple, sturdy and supportive.
PIN IT FOR LATER
I’m confused — How do you precisely and place the holes for the 80 degree angle? Do you drill then cut the angle? Or does the tool you use handle angles like that?
Thanks for the question and helping us better explain the project. The holes were drilled on the edge after the angle was cut. The Joint Genie jig can be placed on the angle and keep the drill bit straight.
Hey there! I thought this was a perfect idea to make for Father’s Day or my dad’s birthday, but I’m curious as to what type of wood that you used.
We used select pine boards to make the record stands.