In this electrical outlet install tutorial, we demonstrate how we added an additional outlet in our garage and installed an electrical outlet inside a drawer to charge tool batteries.
This week we are excited to bring you our first project to kick off our garage makeover, adding electrical outlets. An electrical outlet install might seem like a small project, but having only one outlet in the entire garage/shop is inconvenient.
Currently, our solution for only having one outlet is to run an extension cord from inside the house which allows us to plug in one 15amp tool and a vacuum for dust collection. This is far from an ideal situation so an electrical outlet install was on the top of our to-do list for the garage.
The outlets in this tutorial are ran from the existing outlet but soon we will also be adding outlets from new breakers. Plus, while we are at it, we decided to add an outlet inside a drawer of one of our new cabinets to charge tool batteries so it keeps the counter clutter free.
Important: Use caution when working with exposed wires! Exposed wires can shock you. All tips below are based on our experience and if you use any of the techniques shown below, you are doing so at your own risk.
VIDEO TUTORIAL
To see new DIY videos on Sundays, be sure to subscribe to our channel ⇾
SUPPLIES
*This post contains a few affiliate links. You can read our disclosure policy here.
ELECTRICAL OUTLET INSTALL: TOOL CHARGING DRAWER
Add new wire to existing outlet
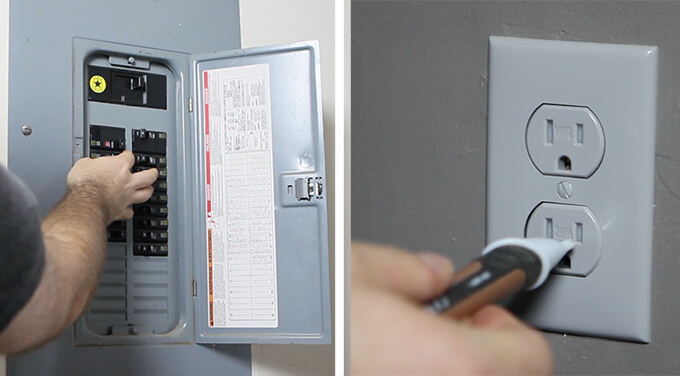
1. Before starting a project involving electrical outlets, I turn off the breaker that supplies power to the outlet. I double checked the power was off by using a voltage detector. The voltage detector beeps and turns on a light when it senses electrical current.
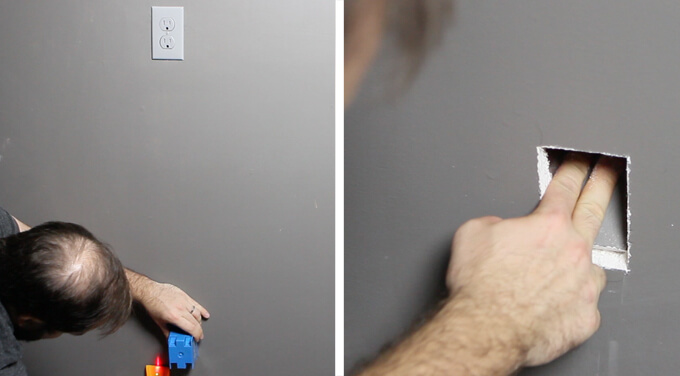
2. I used a stud finder to locate the wall stud and marked where to cut the hole in the wall with a pencil. I used a jab saw to cut the hole for the new outlet.
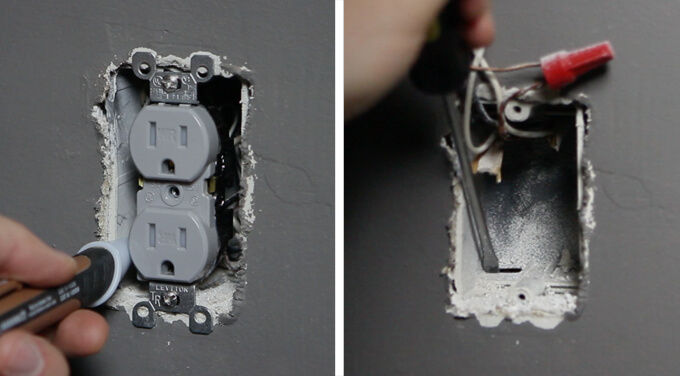
3. After removing the face plate, I double checked one more time that the power was off and removed the plug by unscrewing the top and bottom screws. Using a flat head screw driver and a mallet, I popped out the bottom tab in the existing electrical outlet.
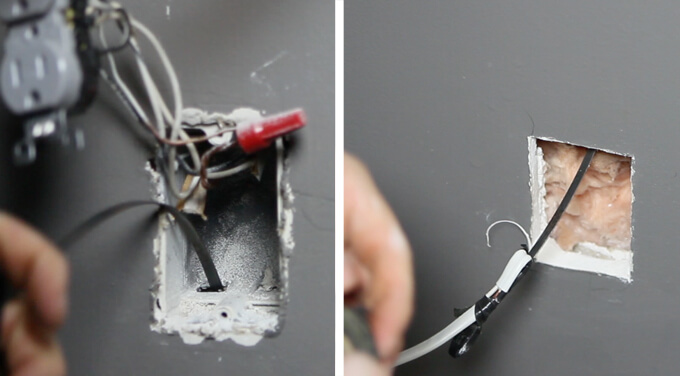
4. To run the new romex cable for the bottom plug, I pushed a fish tape down through the hole in the bottom of the existing electrical box.
Once the end was pulled out of the hole cut in step 2, I taped the romex wire to the end of the fish tape and pulled the wire up through the top electrical box.

5. To strip the wire it is only necessary to cut the end of the cable 1/2″. The white plastic tears away from the inside wires. To remove all of the wires inserted in the back of the plug, I used a small flat head screwdriver and released the wire by pressing a tab next to each wire.
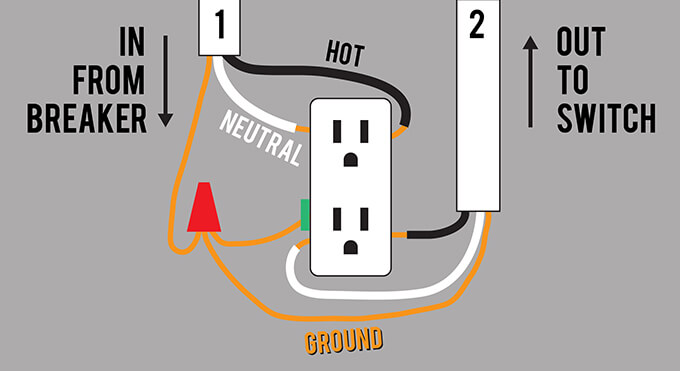
There are only two places to connect wires to the electrical outlet. The existing outlet already had two sets of wires connected so we couldn’t connect the third wire.
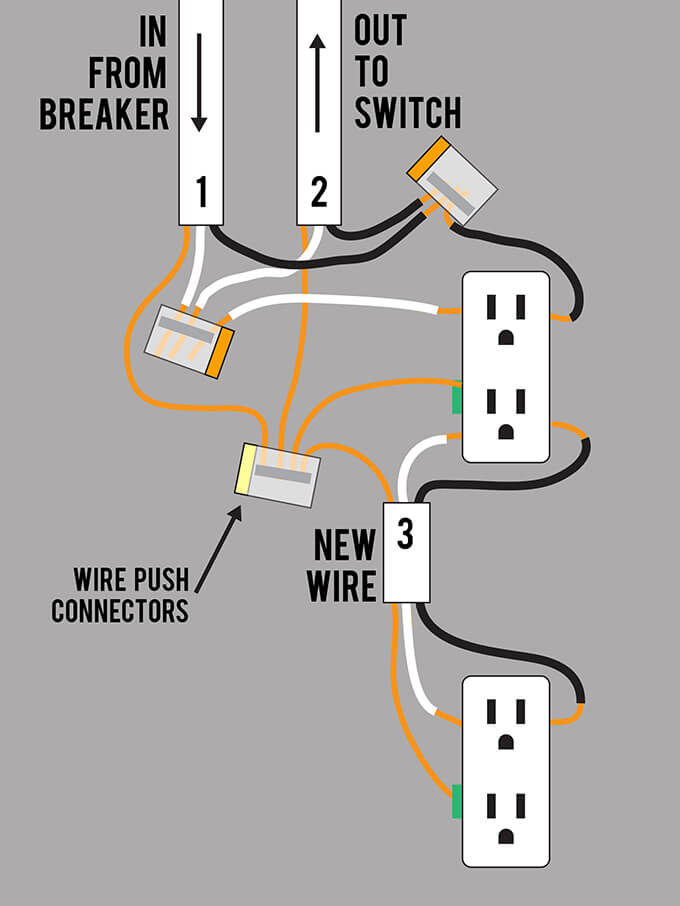
The diagram above illustrated how we used push connectors to combine the wires.
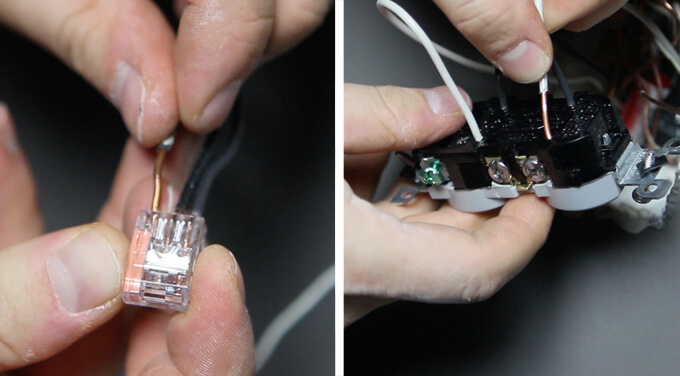
6. Using a wire push connector, I combined the two existing sets of wires making room for the new wire.
Install new electrical outlet
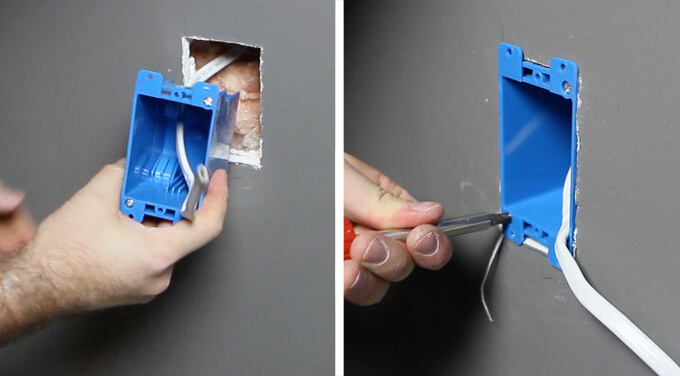
7. Before installing the bottom outlet, I cut the romex about a foot from the wall and fed it through the back of the box. The box attaches to the wall with tabs that clamp the drywall between the tab and box when each screw is tightened.
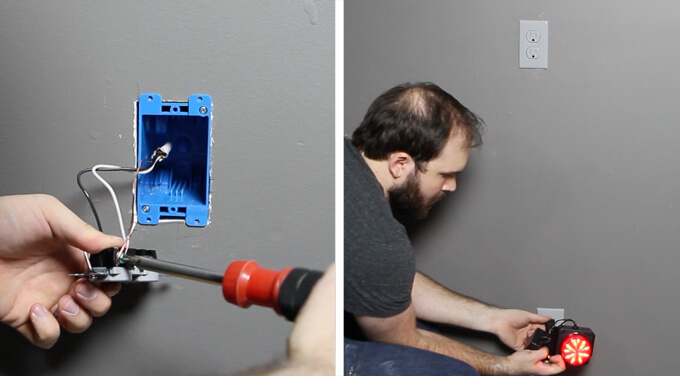
8. The bottom plug was installed by stripping each of the wires 1/2″ on the end, inserting the white and black wire into the back of the outlet, and securing the bare wire under the ground screw.
I turned the breaker back on and tested each plug with a light.
Install drawer electrical outlet
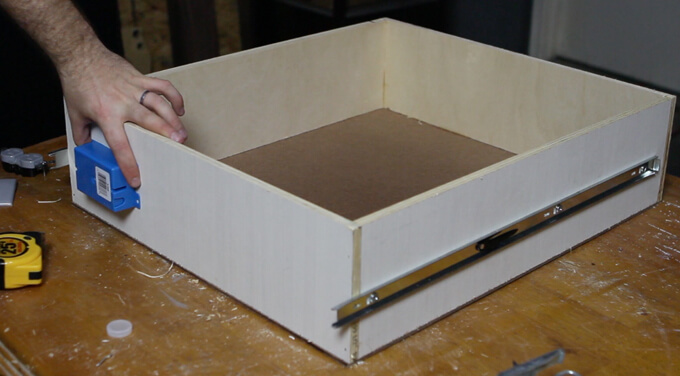
9. To allow us to charge our tools in a drawer and keep the work surfaces clutter free, we removed a drawer and marked where the outlet would go by tracing the outline of an electrical box.

10. I cut a hole for the electrical box by drilling holes in each corner and then cut the straight lines with a jigsaw.
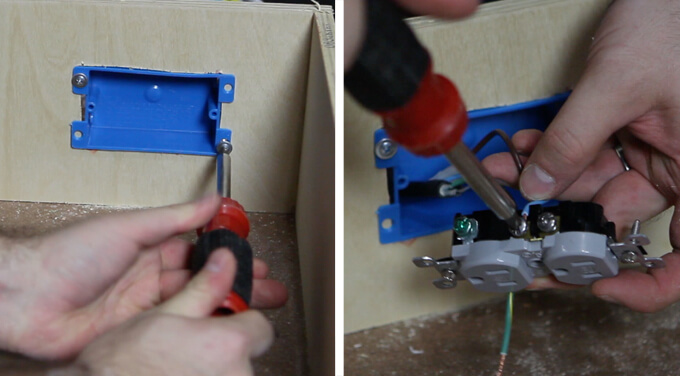
11. Unlike the electrical box in the previous steps, this electrical box screwed through the front. The cable I used is recycled from an old computer. Since the wires are stranded I hooked up the outlet using the screws located on the side of the plug.
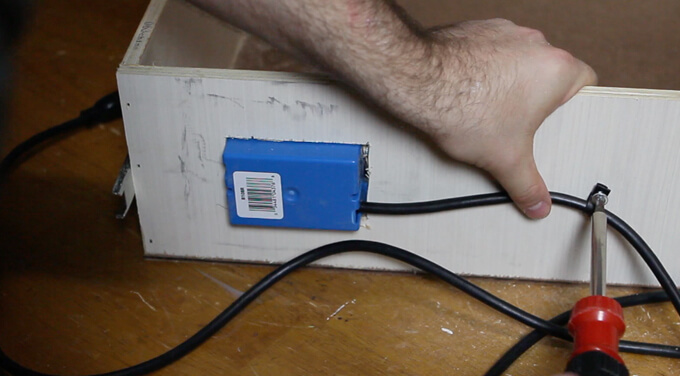
12. To prevent the cable from pulling away from the back of the electrical box, I used a plastic cable clamp to keep the cable in place.
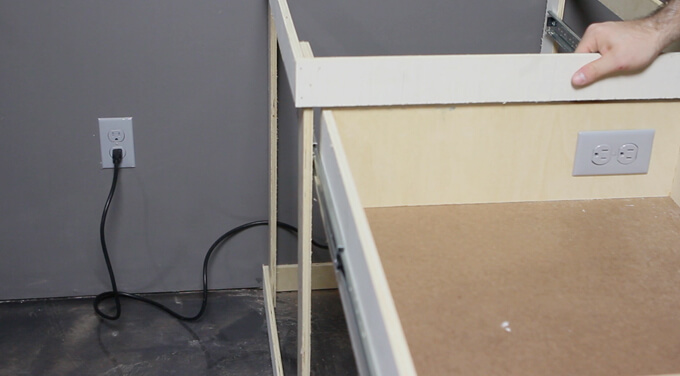
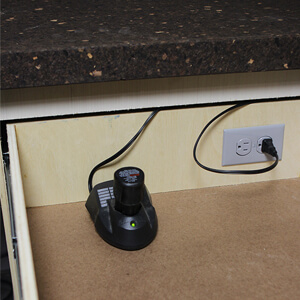
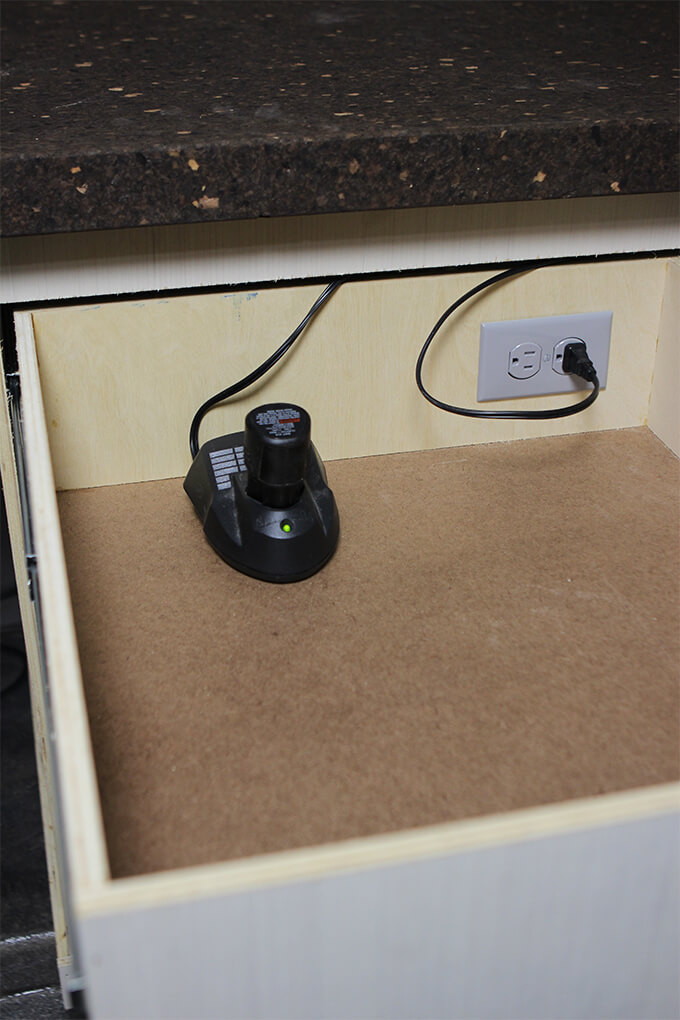
13. Finally, I plugged in the drawer outlet. Now I could plug my battery chargers in the drawer and they are hidden out of the way.
Installing electrical outlets is oddly satisfying. It is a messy process but once all the faceplates are screwed back on, the results are really nice.
Let us know if you have any questions about our process.